Learning Go Using Visual Studio Code With Dev Containers Extension
January 8, 2024
Prerequisite #
- Docker Desktop is installed.
- Visual Studio Code is installed.
- Visual Studio Code Dev Containers Extension.
Goal #
- Print “Hello World!” in terminal using Golang.
Project Setup #
It’s the best practice to isolate all source code into one single location other than your “Home” folder or “Documents” folder. I suggest name it as “workspace”.
-
Create a folder called
learn-goin your “workspace”. -
Create a sub-folder called
.devcontainerunderlearn-gofolder. -
Create an empty JSON file called
devcontainer.jsonin.devcontainer. -
Copy and paste following content into this file.
{
    "image": "mcr.microsoft.com/devcontainers/go",
    "name": "ms-go-devcontainer"
}
More Dev Container templates can be found here
The above steps should result a folder structure look like the following.
learn-go                               # directory
├── .devcontainer                      # directory
│   └── devcontainer.json              # file
Run Go In Dev Container #
-
Open Visual Studio Code and use “Open Folder …" function from the “File” menu to open
learn-gofolder. -
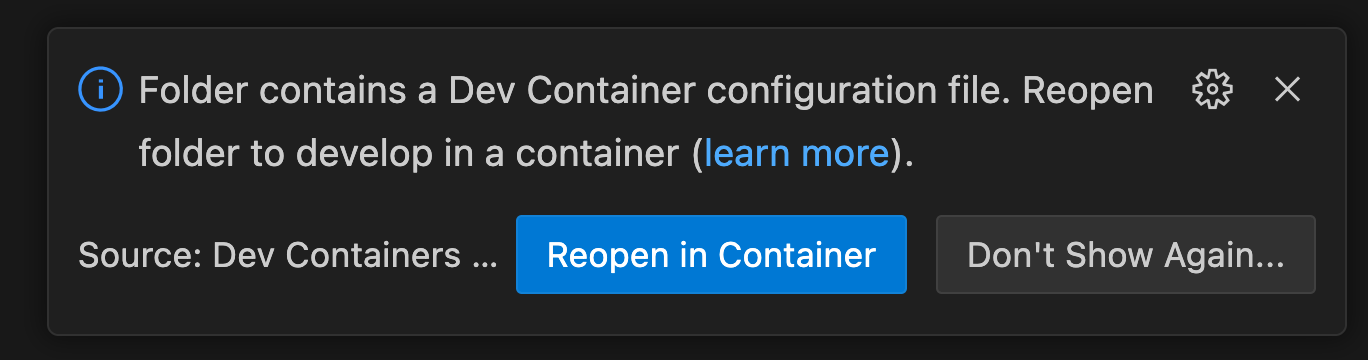
When prompt please choose Reopen in Container.
-
Verify the Dev Container is connected. The bottom right of the Visual Studio Code should look like this.

-
Use
Ctrl + `to open the terminal panel. -
Run following command to make your current folder as a Go module.
go mod init learn-go -
Create a new file with name
hello.go. -
Copy and paste the following content into this file.
package main import ( "fmt" ) func main(){ fmt.Println("Hello World!") } -
Run following command in terminal and the “Hello World!” should be displayed.

👍 DONE!